This is part of our Hockey 101 series: positioning and team systems for beginner and intermediate players, and for teams that never get a practice.
Zone entry is the moment your forwards carry the puck over the opponent's blue line. Done well, it happens as a tight unit of three, which is exactly what a good breakout sets up. If that rush stalls in the middle, reset with a neutral zone regroup before you force the blue line.
F1, F2, F3
Once forwards leave their defensive zone spots, positions get fluid. Instead of center and wings, modern systems talk about F1, F2, and F3, usually numbered by who is closest to the puck (or the order they enter the zone). This article covers the most fundamental three-player entry: the Wide Drive.
The Wide Drive
The Wide Drive is the most common zone entry in hockey, and the bread and butter of any systems-based attack. Each forward has one job.
F1: drive wide
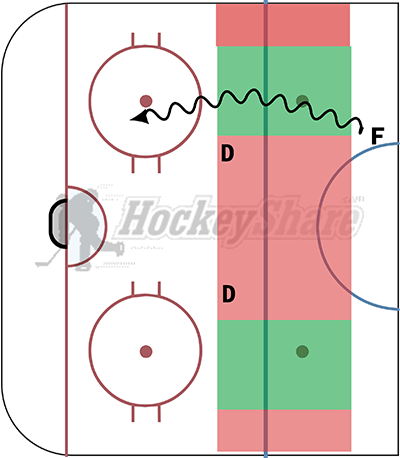 F1 has the puck and enters the zone wide, usually in line with the faceoff dots. Going wide does two things: it gives F1 more options, and it forces the defenders to commit, so F1 is playing 1v1 instead of 1v2.
Do not go too wide. The boards are a defender's best friend, and hugging them takes away your space.
Crossing the line near the dot is ideal, depending on where the defenders are set up. From there F1 can beat a defender with speed, or make a delay move or escape turn in the circle to buy time while teammates arrive.
F2: drive the net, then stop
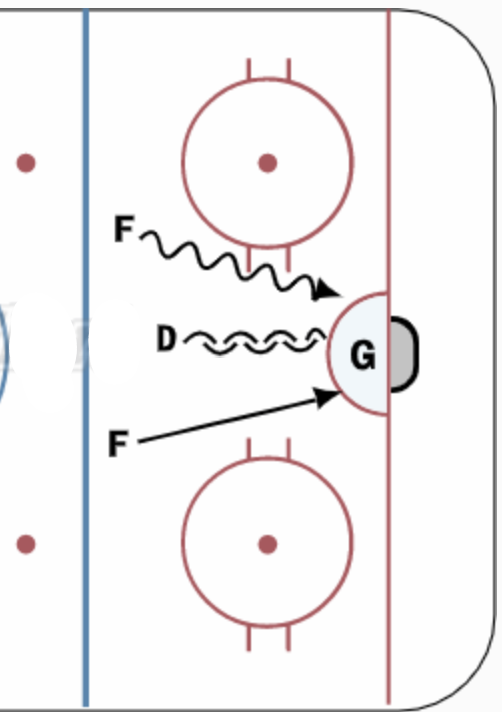
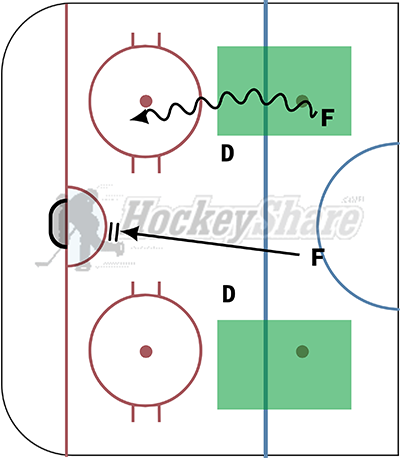 F2 drives hard up the middle to the net. One of three things happens: the near defender gets pulled away from the puck carrier, the second defender has to pivot to pick up F2, or nobody does and F2 is alone in front of the net.
Skate at full breakaway speed, then stop in front of the goalie. From there you can drop low to support a dump in or a cycle, or stay in the slot as a shot or tip option.
Do not do the lazy circle into the corner when the pass does not come. It takes you, and your team, out of the play. Stop in front.
F3: backside support
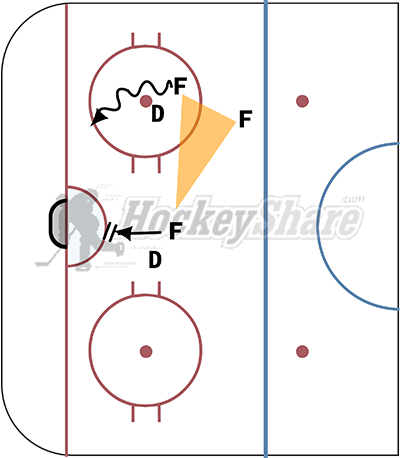 F3 supports F1 from behind, offering a passing option or picking up a loose puck. F3 should cheat toward the middle rather than skate directly behind F1, because the middle is usually the more open lane for a shot.
If the defense is tied up with F1 and F2 and nobody picks up F3, F1 can drop the puck to F3 for a quick shot, with F2 screening or tipping in front.
Remember to skate
Zone entries work when the players without the puck skate faster and harder than the player with it. The puck is not on your stick? That is not a cue to coast.
Examples
Quick checklist
- F1: carry it wide at the dots, not on the boards. Attack 1v1, delay if you need time.
- F2: drive the middle at full speed, then stop at the net. No lazy circles.
- F3: trail toward the middle, ready for a drop pass and a quick shot.
- Everyone: keep your feet moving, with or without the puck.
Bottom line
One wide, one to the net, one trailing in the middle. Run the Wide Drive every time you cross the blue line and your team will generate more chances than it gets from three guys skating in a straight line.
It works best when the same line plays together every week. If your lineup still gets sorted out by group text, that is what RosterFX is for.
Keep reading: Hockey 101: Basic Breakout Strategy · Hockey 101: Neutral Zone Regroup · Hockey 101: Basic Power Play Formations · More Hockey 101